
Reviewed · WORKSHOPS
Copenhagen Photography Masterclass – Private Photography Lesson
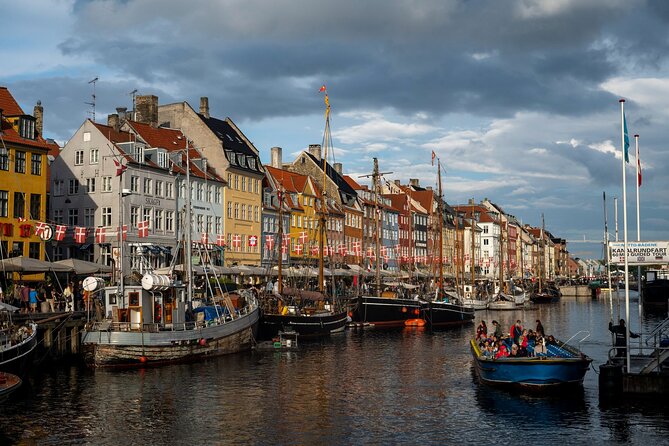
Copenhagen looks good in every season, and this private photo lesson teaches you why. You start in the historic harbor area and work through top architectural scenes, with a local guide plus a photography professional guide helping you see light, lines, and angles differently. Depending on your session, you’ll focus on daylight street scenes or on Copenhagen’s glow after dark.
I like that the lesson is built around real photo problems you’ll face in the city, not generic tips. You’ll get guidance while walking past places like Nyhavn and major landmarks, so you can practice composition on the spot instead of guessing later in front of your screen. I also appreciate the practical focus on nighttime shooting, where city light turns canals, churches, and monuments into dramatic subjects.
One thing to plan for: you need your own camera, and if you book the night session, it can get cold even in spring. If you do not have a tripod, you can ask for one, but still bring what you need for stable shots and comfort.
In This Review
- Key things I’d prioritize before booking
- How this 3-hour Copenhagen masterclass actually helps your photos
- Price and value: what $177.44 buys you in Copenhagen
- Starting at Nyhavn: where you learn to shoot water and color
- Rosenborg and Amalienborg: learning how to frame heritage without freezing
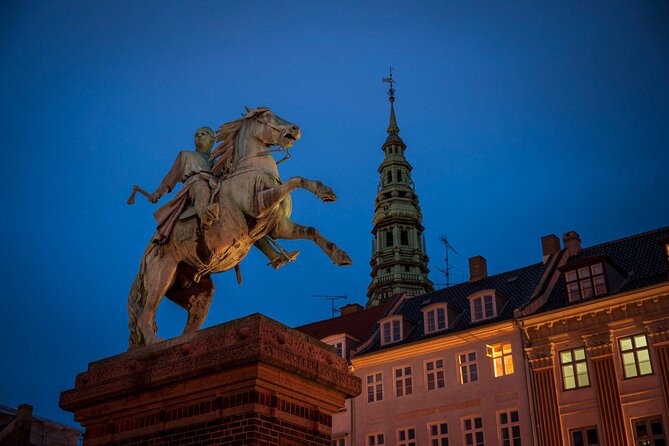
- Frederiks Kirke and Christiansborg Slot: mastering light on stone
- Copenhagen Opera House and Gammel Strand: when modern angles meet old streets
- Kastellet and Christianshavns Beboerhus: tightening your eye for structure
- Night session guidance: turning Copenhagen’s glow into better night photos
- Practical tips you’ll appreciate on the walk
- Who this Copenhagen photo lesson suits best
- Should you book this private masterclass?
- FAQ
- How long is the Copenhagen Photography Masterclass?
- Where does the tour start?
- Does the tour end at the same meeting point?
- What language is the session offered in?
- Is this a private tour?
- Is a tripod provided?
- What is included in the tour price?
- What is the cancellation policy?
Key things I’d prioritize before booking
- Private lesson format with a local guide and a photography professional guide, so the pacing can match your questions
- Day and night sessions that train you for two very different kinds of Copenhagen light
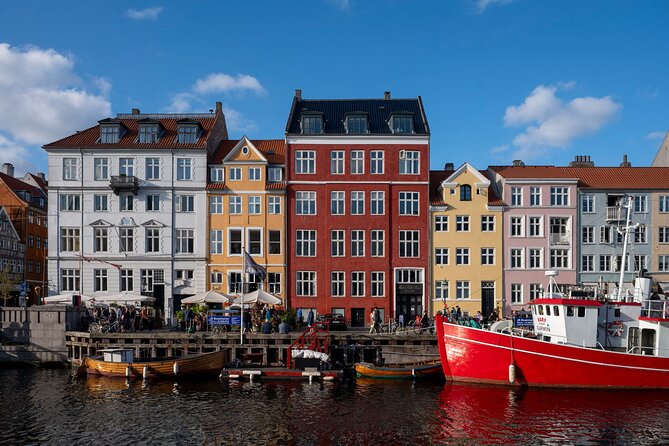
- Classic stops on a walkable route, from Nyhavn to Rosenborg, Marmorkirken, and Kastellet
- Night photography focus with technique guidance for low light and city glimmer
- Tripod available on request, which helps if you want sharper nighttime results
- Mobile ticket and easy meeting point near public transportation for a smoother start
How this 3-hour Copenhagen masterclass actually helps your photos
This is not a drive-by sightseeing tour with a camera thrown in. It’s a structured photo lesson in motion, built around Copenhagen’s visual variety, from colorful waterfront streets to pale stone churches and palace architecture.
The payoff is that you learn by doing. You walk to recognizable places, then the guide nudges your eye toward specific choices like where to place the horizon, when to switch from wide-angle context to tighter details, and how to handle bright highlights at night. By the time you reach the next landmark, you are already using what you just practiced.
Because it’s private, you are not stuck with a one-size-fits-all pace. If you want to concentrate on exposure settings, framing, or how to make buildings feel alive, you can steer the conversation more than on a group tour. That matters because Copenhagen can be tricky: daylight is bright, and at night the city throws a mix of warm lamps and cooler shadows at you.
More photographers working Copenhagen:


Price and value: what $177.44 buys you in Copenhagen
At $177.44 per person, you are paying for three big things: a private format, expert guidance, and a concentrated time window. Three hours is long enough to move between key areas and still have time to test ideas, but it is short enough that you do not lose the day to transit.
What makes the value feel real is the inclusion list. You get a local guide and a photography professional guide, and the tour is explicitly private, meaning only your group participates. That setup is usually where photography learning becomes more effective, because you get immediate feedback instead of a lecture you can only apply later.
If you are traveling with friends who also want to learn, check the group discount angle. Even if you are a beginner, the lesson is still practical, because the guidance helps you use the camera you already have. If you already know how to shoot at night but want better city results, the technique focus should help you tighten your process.
Your main cost is what you bring. The tour does not include a camera, so you’ll want to show up ready with your own gear and batteries.
Starting at Nyhavn: where you learn to shoot water and color
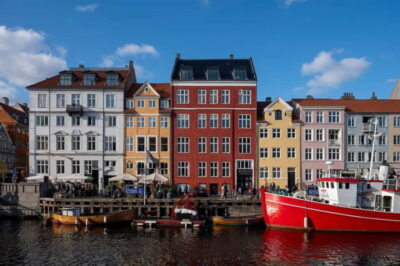
Nyhavn is a confident place to begin, because the scene gives you both story and structure. You can photograph classic waterfront facades, reflections, and the layered feel of canal life. In daylight, the water makes a natural “leading line” effect, while in low light it turns into a reflective surface for lamps and window glow.
This is also where you start learning the fast fundamentals. The guide can help you decide how wide to go, how to keep vertical lines straight on tall buildings, and how to avoid the common problem of focusing on reflections while forgetting the main subject.
If you like photos that feel cinematic, Nyhavn is a strong base for that style. You can practice a look that balances context with detail, which is especially useful in a city packed with interesting textures.
One practical tip: wear shoes that work on uneven stones. You will be walking between points, and the better your footing, the steadier your shots.
Rosenborg and Amalienborg: learning how to frame heritage without freezing
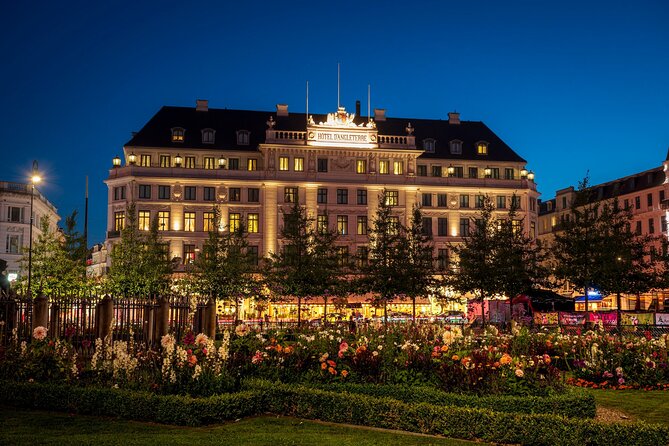
Rosenborg Castle and Amalienborg Palace Museum bring a different photographic challenge than the waterfront. Here, you are dealing with grand facades and formal architecture, so your composition choices become the story.
I like photographing landmarks like this because they teach you something you can reuse everywhere: how to shoot buildings so they feel tall and dignified without turning them into a messy wall of stone. The guide can help you choose angles that keep symmetry working for you, or intentionally break it for a more dynamic feel.
Amalienborg adds a formal, slightly more ceremonial mood to the walk. If you want your photos to show Copenhagen’s blend of past and present, this area helps you capture that contrast. You get strong lines and recognizable shapes, but you also get the everyday urban feeling around the palace setting.
A drawback here, if you are extremely sensitive to crowds, is that these landmarks can be popular. The private format helps, because you can slow down for your learning moments instead of being hurried by a group schedule.
More workshops to sit in on in Copenhagen:
- Private Photography Workshop in Copenhagen
★ 5.0 · 3 reviews - Copenhagen (2-Hour Paper Marbling Workshop with Goda)
★ 5.0 · 3 reviews - Copenhagen: Photography Masterclass – Private Photo Lesson
★ 5.0 · 2 reviews
Frederiks Kirke and Christiansborg Slot: mastering light on stone
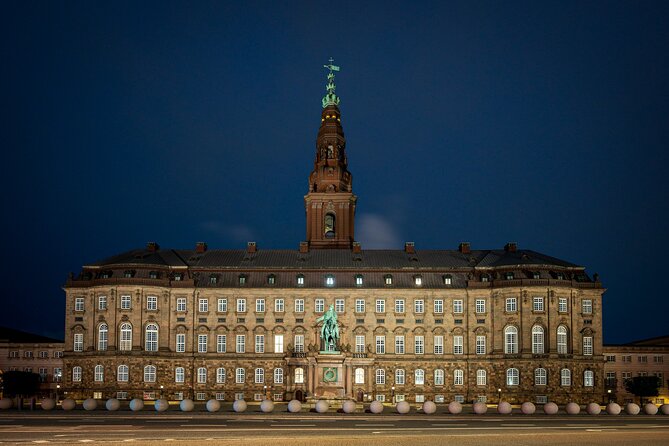
Frederiks Kirke, also known as Marmorkirken, is one of those places where the camera immediately shows you your exposure mistakes. Light bounces off pale stone, windows can blow out, and details can turn flat if you pick the wrong settings.
This stop is valuable because it trains you to think beyond “point and shoot.” You learn how to protect highlight detail and how to adjust your framing when the sky is bright. For night shooting, church fronts often give you a mix of contrast and texture, which can create dramatic results if you set your exposure carefully.
Christiansborg Slot brings more variety. You get different architectural surfaces and sightlines, so it is a chance to practice moving from wide shots that establish the building to tighter shots that focus on details like edges, doors, and sculptural elements.
If you struggle with night photos, churches and palaces are where you learn quickly. The surfaces show you how your camera handles mixed lighting, and the shapes give your image a clear subject.
Copenhagen Opera House and Gammel Strand: when modern angles meet old streets
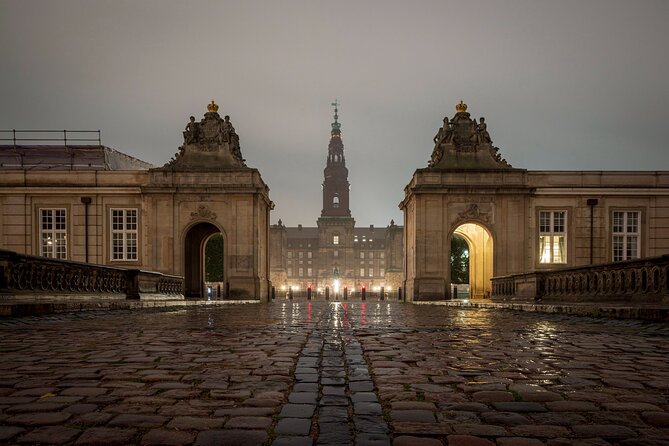
The Copenhagen Opera House is a good place to practice a modern Copenhagen look. Even if you are a beginner, it’s easier to shoot when you have a clear shape, strong lines, and open space around you for positioning.
This is where you can experiment with perspective. Try lower angles to emphasize scale, or switch to wider framing so the opera house sits in a larger city context. If the lesson includes guidance on nighttime shooting, the opera area is also where you can experiment with reflections and light trails from nearby streets.
Gammel Strand adds a different mood. It feels more grounded, and it can help you avoid the trap of only photographing the most famous monuments. You can aim for street-level scenes, shoreline textures, and compositions that show life around the buildings, not just the buildings themselves.
A practical note for your planning: keep your camera settings consistent across short segments. If you constantly restart your setup, you lose chances to compare results, and that slows learning.
Kastellet and Christianshavns Beboerhus: tightening your eye for structure
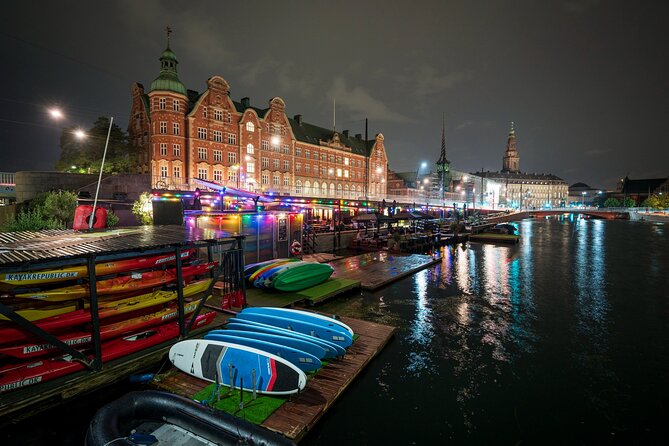
Kastellet, the fortress area, is perfect for practicing structure. Fortifications naturally produce repeating lines and strong geometry, and that helps you improve composition fast.
When you shoot fortress-style views, you learn how to manage depth. The guide can help you frame so the foreground leads into midground and background instead of flattening the scene. If you care about sharpness, this part of the walk is also where you can test whether your technique produces crisp edges and good focus.
Christianshavns Beboerhus brings another useful change. It is a reminder that Copenhagen is not only landmarks and postcards. You get a more local feel, which helps your photo story feel real. If you want your photos to feel like Copenhagen beyond the obvious, this kind of stop matters.
Night session guidance: turning Copenhagen’s glow into better night photos
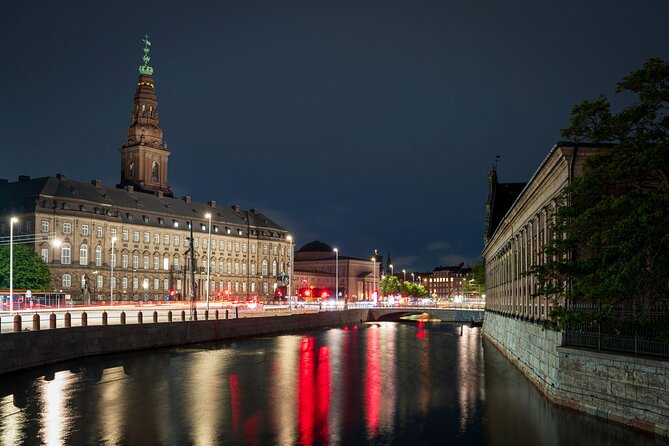
For night photography, Copenhagen earns its reputation. The light is colorful, reflections appear where you least expect them, and monuments take on a softer, storybook mood.
The lesson is designed to help you handle the classic night problems: too much brightness, blurry results from camera shake, and images that are underexposed or muddy. The guide’s role is to help you make deliberate choices so your night images feel intentional.
One theme I’d expect from a strong night lesson is the look. You can end up with a more painterly feel when exposure and contrast are handled well, especially around well-lit streets and landmarks. That style works because it keeps details while allowing the city lights to soften into a glow.
And yes, plan for cold. Even in May, night can get chilly, and thin gloves help more than you’d think. Cold hands lead to shaky shooting and fumbling with controls, which ruins otherwise good settings.
If you want long exposures, ask about tripod availability ahead of time. Even with a tripod, you’ll still want to dress for the cold and give yourself time to settle before you take key shots.
Practical tips you’ll appreciate on the walk
Here’s how to get the best results from this kind of lesson without overcomplicating it.
- Bring the right power and settings. Charge your battery before you head out. Night sessions can drain batteries faster, especially with lots of previews.
- Consider a small warm layer for night. Gloves are a simple upgrade for comfort and steadier hands.
- Request a tripod if you have one goal in mind. If your aim is sharper low-light shots, a tripod can help. If you skip it, you’ll lean more on faster shutter speeds and steady handling.
- Use your phone less during the lesson. It’s tempting to check the screen constantly, but it interrupts practice. You want to compare shots quickly and keep moving.
- Focus on one learning target per stop. For example, “straighten lines here,” then “exposure here,” then “reflections here.” That keeps your brain from turning into a settings soup.
You’ll also appreciate the simple logistics: mobile ticket, confirmation at booking, and meeting right at Nyhavn at Nyhavn 1F, 1050 København. The tour ends back at the same meeting point, so you are not left figuring out where to go next.
Who this Copenhagen photo lesson suits best
This is a good fit if you want a mix of recognizable Copenhagen sights and real photography coaching in a short, focused window.
It works well for:
- first-time visitors who want more than a checklist of monuments
- camera users who want guidance on framing and night exposure
- couples and friends who prefer a private experience instead of a group herd
- anyone who wants a walking route that naturally teaches the city’s light differences
If you are an absolute expert with highly technical workflows, you might still enjoy the creative ideas and the controlled practice around specific landmarks, but you may need to ask more pointed questions to get exactly what you want.
Should you book this private masterclass?
If you care about making photos that look like Copenhagen, not just photos of Copenhagen, I think this booking is worth strong consideration. The private format, the involvement of a photography professional guide, and the structured approach to both daylight and night light are the real reasons to choose it.
Book it if you:
- want help understanding how to frame famous spots like Nyhavn and Marmorkirken
- plan to shoot at night and want guidance that reduces guesswork
- appreciate a city walk where the focus stays on photography
Skip it if:
- you do not want to do any real walking
- you are unwilling to bring your own camera and gear
- you expect a lesson that includes equipment beyond what’s offered on request
If you do book, show up ready. Bring your camera, dress for nighttime chill, and be ready to take a lot of small practice shots. Copenhagen rewards patience, and a good pro lesson helps you turn that patience into images you actually want to keep.
FAQ
How long is the Copenhagen Photography Masterclass?
The experience is about 3 hours.
Where does the tour start?
It starts at Nyhavn Drikkevandsfontæne, Nyhavn 1F, 1050 København, Denmark.
Does the tour end at the same meeting point?
Yes, it ends back at the meeting point.
What language is the session offered in?
The tour is offered in English.
Is this a private tour?
Yes, it is a private tour/activity. Only your group will participate.
Is a tripod provided?
A tripod is available upon request, but a camera is not included.
What is included in the tour price?
Included are a local guide and a photography professional guide, plus the private tour.
What is the cancellation policy?
Free cancellation is available. You can cancel up to 24 hours in advance for a full refund.
The latest around Copenhagen
- Copenhagen: Guided Tour of Vesterbro and Christianshavn★ 5.0 · 1 review
- Stevn Klint UNESCO Heritage Tour and Vikingborg Fort.★ 5.0 · 1 review
- Historical Pod Walk Tour on the Slaves of Copenhagen★ 5.0 · 1 review
- Copenhagen Old Town, Nyhavn, Canal Walking Tour & Christiana★ 5.0 · 1 review
- Queer Copenhagen Historical Tour★ 5.0 · 1 review
- Castle Island’s Royal History: A Self-Guided Audio Tour of Slotsholmen★ 5.0 · 1 review
Workshops, compared.
Copenhagen (2-Hour Paper Marbling Workshop with Goda)
Read our review →

World-class street football experience in Copenhagen
Read our review →Browse the lists this tour appears in